
What is sipgate.io?
sipgate.io is a collection of APIs, which enables sipgate’s customers to build flexible integrations matching their individual needs.
Among other things, it provides interfaces for sending and receiving text messages and faxes, monitoring the call history, as well as initiating and manipulating calls.
For this tutorial we’ll concentrate on its functionality to send faxes.
Introduction
You might think sending faxes is a bit outdated, and you might be right. However, there still might be reasons for you or your organization to use it. Anyways, in this tutorial, we’ll show you how to build a minimal fax sending app which runs on both Android and iOS.
The code for this tutorial can also be found on GitHub.
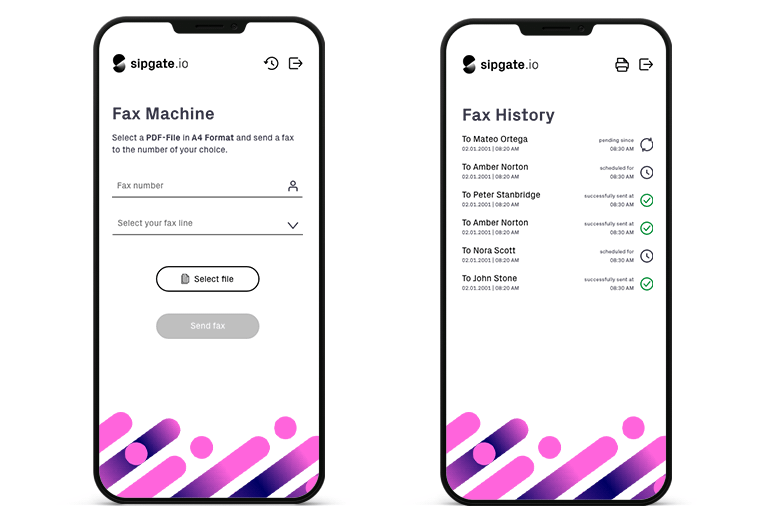
See the finished result on our solution page.
Need inspiration?
While this tutorial covers only the basics, you can take a look at our more enhanced fax example app where we implemented additional features like a history list, native contact picking and proper styling:
Choice of Tools
In order to only have to maintain a single codebase, we’ll be using React Native, which means we’ll be writing code in Javascript. This in turn enables us to use the sipgate.io node library.
Setup
To setup your development environment, head over to the React Native documentation, choose React Native CLI Quickstart and select your operating system and your preferred target OS.
With react-native init projectName you can create a quickstart project.
You should now have the required tools at your disposal. To check that everything works you can run the adb command for Android. For iOS you can try out pod on Mac.
We’ll also need to install the sipgate.io node library using npm install sipgateio.
Building the UI
First of all, you have to login into your sipgate account. Therefore we’ll build a simple login form like this:
// App.js
const App = () => {
  const [tokenId, setTokenId] = useState("");
  const [token, setToken] = useState("");

  const renderLogin = () => {
    return (
      <View>
        <TextInput
          placeholder="TokenId"
          value={tokenId}
          onChangeText={setTokenId}
        />
        <TextInput
          placeholder="Token"
          value={token}
          onChangeText={setToken}
          secureTextEntry
        />
        <Button title="Login" />
      </View>
    );
  };

  return <SafeAreaView>{renderLogin()}</SafeAreaView>;
};
We want to actually display the app content once we’re logged in, so we’ll keep track of our login state using another state variable.
Instead of storing the login state directly we’ll store the sipgate.io client, since we will need it later on anyways.
const [client, setClient] = useState(null);
When the client is null we show the login form, otherwise our main content.
const App = () => {
  // renderLogin...

  const renderMain = () => {
    // ...
  };

  return (
    <SafeAreaView>
      {!client && renderLogin()}
      {client && renderMain()}
    </SafeAreaView>
  );
};
The renderMain function will consist of inputs for all the information needed to send a fax.
This includes the recipient’s number, a file to be sent and the fax connection the user is sending from.
We’re gonna use a picker for the faxline, so let’s install a suitable dependency using npm:
npm install @react-native-picker/picker
Before we can implement our renderMain function, we first need to add some state variables for the three inputs recipient, selectedFaxline and selectedFile.
const [faxlines, setFaxlines] = useState([]);
const [recipient, setRecipient] = useState("");
const [selectedFaxline, setSelectedFaxline] = useState(null);
const [selectedFile, setSelectedFile] = useState(null);
Note that we also have an array of faxlines, we’ll fetch those later. For now it’s enough to know that they contain an alias like „Jane Doe’s Fax Connection“ and the id required to send a fax.
Our renderMain should then display the inputs for our state variables. For now we ignore the selectFile and sendFax functions, we will take care of them later.
// We will implement these later
const selectFile = () => {};
const sendFax = () => {};

const renderMain = () => {
  return (
    <View>
      <Picker
        selectedValue={selectedFaxline}
        onValueChange={setSelectedFaxline}
      >
        {faxlines.map((line) => (
          <Picker.Item key={line.id} label={line.alias} value={line.id} />
        ))}
      </Picker>
      <TextInput
        placeholder="Recipient"
        value={recipient}
        onChangeText={setRecipient}
      />
      <Button
        title={selectedFile?.name || "Choose File..."}
        onPress={selectFile}
      />
      <Button
        title="Send"
        onPress={sendFax}
        disabled={!selectedFaxline || !recipient || !selectedFile}
      />
    </View>
  );
};
The send button is disabled if any of the required inputs (faxline, recipient, file) is not set to prohibit sending a fax with missing data.
First test run
Now would be a good time to run your app.
First you have to start the react development server:
npm run start
Android
Using the following command you can start the emulator:
npm run android
iOS
If you did not already install the native dependencies for iOS you can do it now by running pod install in the ios/ folder. Then you can run the app using npm after changing back into the apps root directory.
cd ios
pod install
cd ..

npm run ios
Business Logic
Now that we have the basic UI up and running it’s time to implement the logic.
You will need an Personal Access Token, with faxlines:read and sessions:fax:write scopes. Learn more about our Personal Access Token here.
We’ll start with the login function. Using the getAuthenticatedWebuserId function we check whether the provided credentials are valid, since simply creating a client will not verify them.
const login = async () => {
  const client = sipgateIO({
    tokenId,
    token,
  });
  await client.getAuthenticatedWebuserId();

  setClient(client);
};
We also want to load the available faxlines so that we can display them in the previously implemented picker.
import { createFaxModule } from "sipgateio";

const login = async () => {
  // ...

  const faxModule = createFaxModule(client);
  const lines = await faxModule.getFaxlines();

  if (lines.length === 0) {
    Alert.alert("No fax lines found.");
  } else {
    setFaxlines(lines);
    setSelectedFaxline(lines[0]);
  }
};
Having written our login function, we can now execute it by adding the onPress property to our login button. We also handle errors by displaying a popup message.
const renderLogin = () => {
  return (
    <View>
      // tokenId and token inputs
      <Button
        title="Login"
        onPress={() => login().catch((e) => Alert.alert("Error", e.message))}
      />
    </View>
  );
};
Our login page should be finished now and we can move on to the main page.
Remember how we stubbed out the selectFile dialog? Let’s implement that using the react-native-document-picker dependency.
npm install react-native-document-picker
We can now add a file selection dialog by simply following the code example and calling setSelectedFile on the result.
import DocumentPicker from "react-native-document-picker";

const selectFile = async () => {
  try {
    const file = await DocumentPicker.pick({
      type: [DocumentPicker.types.pdf],
    });
    setSelectedFile(file);
  } catch (err) {
    if (!DocumentPicker.isCancel(err)) {
      Alert.alert("Error", err.message);
    }
  }
};
That was a lot of code, wasn’t it? But we are not quite finished yet! The final piece to implement is the sendFax function. In our case, we make use of react-native-fs to read the previously selected file.
npm install react-native-fs
Unfortunately, the dependency’s readFile function only allows us to read files as base64 encoded while the sipgateio dependency requires a buffer object. We get around this limitation by first reading the file content and then decoding it.
import * as RNFS from "react-native-fs";

const sendFax = async () => {
  const file = await RNFS.readFile(selectedFile.uri, "base64");
  const buffer = Buffer.from(file, "base64");

  // ...
};
Once retrieved, we create a fax object from our inputs and send it using the sipgateio faxModule. As before, errors are caught using popup messages.
import * as RNFS from "react-native-fs";

const sendFax = async () => {
  // ...

  const fax = {
    to: recipient,
    fileContent: buffer,
    filename: selectFile.name,
    faxlineId: selectedFaxline.id,
  };

  try {
    const faxModule = createFaxModule(client);
    await faxModule.send(fax);
  } catch (err) {
    Alert.alert("Error", err.message);
  }
};
This concludes the coding of the app. Go ahead, try it out and tweak the code depending on your needs.
Deployment
If you followed the setup guide for react native, you should be able to build your app using either an IDE of your choice for android or Xcode for iOS. We will introduce you to the necessary steps to successfully get your fax app onto your device.
Android
To build an .apk for Android, change your working directory to android/ and build the app using gradle.
cd android/
./gradlew assembleRelease
The final app-release.apk will end up in app/build/outputs/apk/release.
You can now copy the .apk to your device and install it by enabling unknown sources.
iOS
Release builds on iOS are a little more complicated than on Android as it will require you to create an apple account for Xcode. An in-depth guide on building apps with Xcode can be found in the react-native guide on running on devices.
Keine Kommentare